
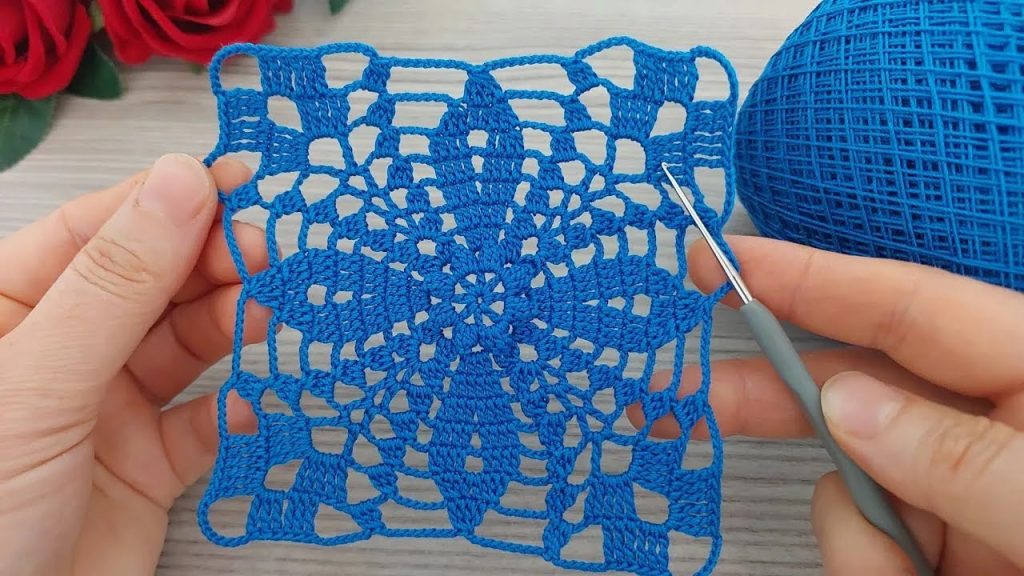
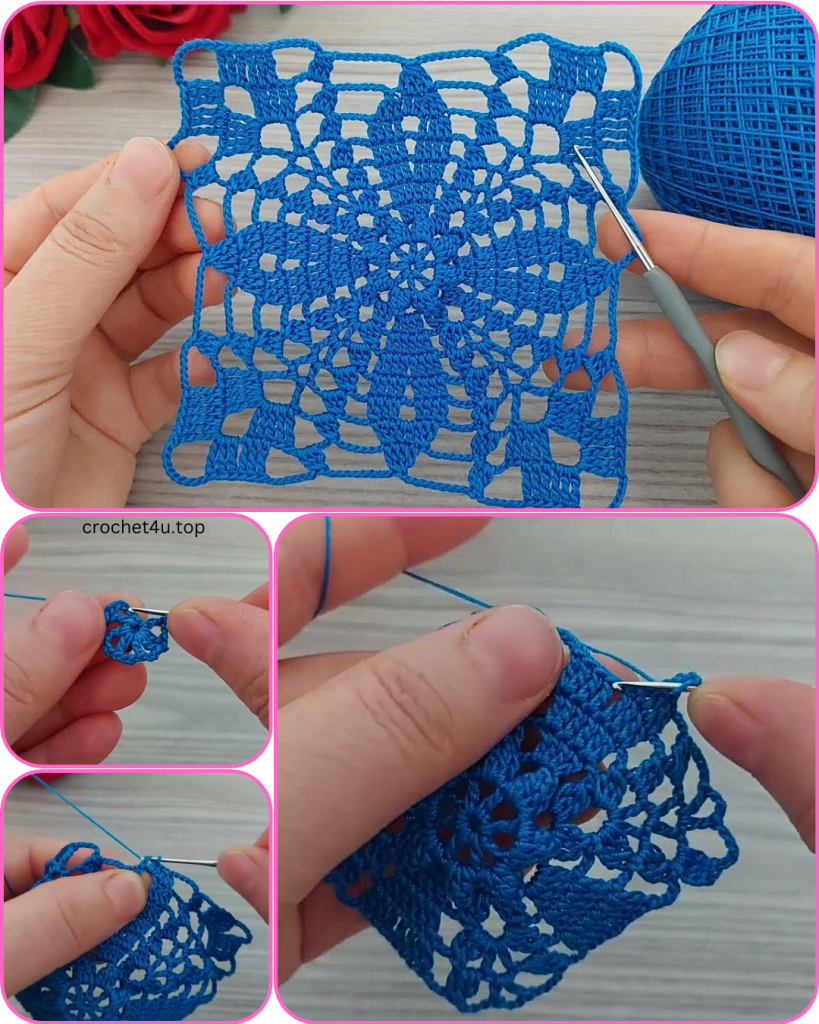
Crochet motifs have been cherished for generations, blending timeless beauty with endless creativity. Today, I’ll guide you through making a beautiful lace square motif featuring a striking starburst floral design at the center. This motif is lightweight, airy, and versatile—perfect for both small and large projects. By the end of this tutorial, you’ll not only have a finished motif but also the knowledge to expand it into countless creations.
Let’s get started!
Materials Needed
- Thread or Yarn: Fine cotton crochet thread (size 10 or 20 recommended). In the image, a mercerized cotton thread in royal blue is used.
- Hook: Steel crochet hook size 1.25 mm – 1.5 mm for thread, or an appropriately sized hook for your chosen yarn.
- Scissors: For cutting the thread.
- Tapestry Needle: To weave in ends neatly.
- Blocking Board & Pins (Optional but Recommended): For shaping the lace square perfectly after finishing.
Tip: For beginners, you may try with sport weight yarn and a 3.5 mm hook to see stitches more clearly, then move to finer thread once comfortable.
Stitch Abbreviations (US Terms)
- ch = chain
- sl st = slip stitch
- sc = single crochet
- dc = double crochet
- tr = treble crochet
- sp = space
- rep = repeat
Step-by-Step Crochet Instructions
We’ll work the motif from the center outward, forming the floral starburst and then squaring it off with openwork lace.
Round 1: Center Ring
- Make a magic ring (or chain 6 and join with a sl st to form a ring).
- Ch 3 (counts as first dc), then work 15 dc into the ring.
- Join with a sl st into the top of beginning ch-3.
(16 dc total forming a neat round base.)

Round 2: Creating Petal Bases
- Ch 5 (counts as dc + ch-2).
- Dc into next st, ch 2 – rep around.
- Join with a sl st into the 3rd ch of beginning ch-5.
(16 dc separated by ch-2 spaces.)
Round 3: Building Petals
- Sl st into next ch-2 sp.
- Ch 3 (counts as dc), work 2 dc, ch 2, 3 dc into the same sp (this forms the first petal cluster).
- In each ch-2 sp around, work 3 dc, ch 2, 3 dc.
- Join with sl st to top of beginning ch-3.
(16 petal clusters forming a floral outline.)
Round 4: Extending Petals

- Sl st into next 2 sts and into ch-2 sp.
- Ch 3 (counts as dc), work 6 dc into same sp.
- In each ch-2 sp around, work 7 dc.
- Join with sl st.
(Each petal now grows wider with 7 dc.)
Round 5: Defining Starburst Shape
- Ch 5 (counts as tr). Work 1 tr, ch 3, 2 tr in the same sp between petals.
- Skip 3 sts, sc in next, skip 3 sts. Then in next space between petals, work 2 tr, ch 3, 2 tr.
- Rep pattern around.
- Join with sl st.
(This creates a starburst with pointy edges.)
Round 6: Connecting Framework
- Sl st into ch-3 sp of previous round.
- Ch 5 (counts as dc + ch-2). Work dc, ch 2, dc into same sp.
- Ch 5, sc into center sc of next valley. Ch 5.
- In next ch-3 sp, work dc, ch 2, dc, ch 2, dc.
- Rep sequence around.
- Join.

(Now the motif begins opening into lace squares between petals.)
Round 7: Squaring the Motif
This round shapes the design into a square form.
- In corner sp, work (3 dc, ch 3, 3 dc) = corner.
- Along sides: ch 2, dc in sp, ch 2, dc in sp, ch 2.
- Repeat corners and sides until square.
- Join.
Round 8: Final Border (Optional)
- Work corners as (3 dc, ch 3, 3 dc).
- Along sides: ch 2, dc in sp evenly.
- Optionally add picots at corners for decorative flair.
Fasten off, weave in ends. Block to open up the lace and sharpen the starburst details.
Blocking Your Motif
Blocking is essential to make lace motifs look their best. Pin your finished square on a blocking board, stretching evenly at each corner and side. Spray lightly with water or steam block (depending on thread used). Allow to dry completely. This step ensures sharp points and an even square shape.
Variations
- Color Play: Use multiple colors – one for the flower center, another for petals, and a third for the lace frame.
- Larger Projects: Join squares together while working the last round to create tablecloths, shawls, or curtains.
- Edging Idea: Add an extra round of shells or scallops for a more ornate border.
Project Ideas Using This Motif
- Doilies – Use a single motif as a coaster or join four for a centerpiece.
- Curtains – Join many motifs for a delicate lace curtain panel.
- Table Runners – Create long strips of joined motifs for an elegant runner.
- Wearables – Incorporate motifs into tops, shrugs, or ponchos.
- Bags – Use cotton yarn and line the motif fabric to create a stylish summer bag.
Tips for Success
- Keep your tension consistent; lace looks best when stitches are even.
- If you’re new to fine thread crochet, practice with slightly thicker yarn first.
- Don’t skip blocking—it transforms the piece dramatically.
- To join motifs: in the last round, replace some chain spaces with slip stitches into the corresponding space of the adjacent motif.
Video Tutorial:
This lace starburst square motif is a delightful project to master both precision and creativity in crochet. Each motif works up quickly and gives instant gratification, yet when combined, they create stunning heirloom-quality pieces.
Would you like me to expand this into a 5000+ word full blog post (like the style you’ve requested before for AdSense approval, with broader sections, history, deep technique guides, and expanded variations)? Or should I keep it in this pattern-focused style?


