
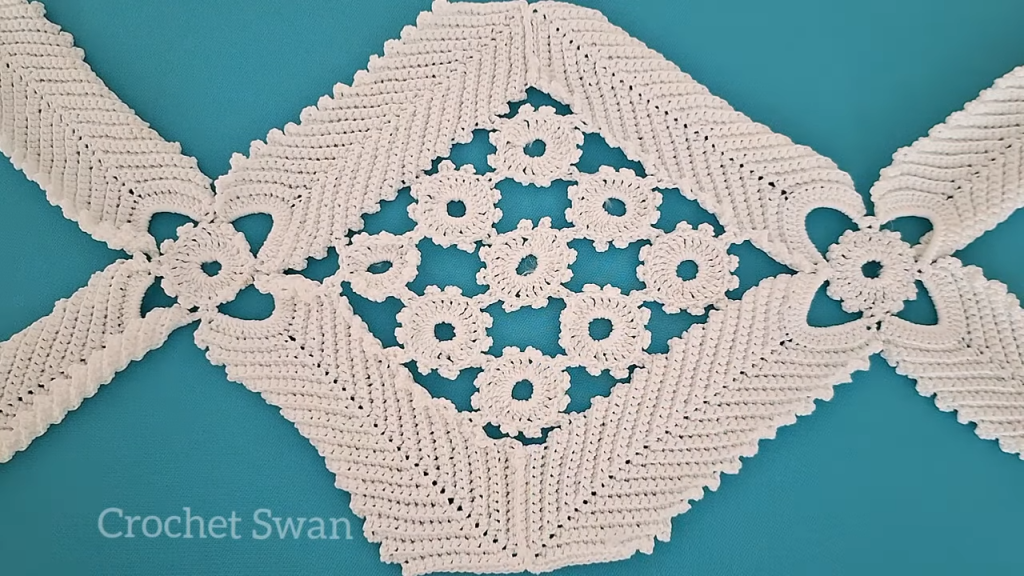
Welcome to the pattern for the “Intertwined Lattice Stitch”! This stunning stitch, inspired by the video, creates a dense, luxurious, and completely reversible fabric that mimics the appearance of woven cables or a tightly knit structure. Using simple double crochet stitches and strategic chain spaces, the pattern builds a beautiful, interconnected lattice that is perfect for scarves, blankets, cushion covers, or even sturdy garments.
This is a two-row repeat that is incredibly meditative once you get the hang of the rhythm and the placement of the stitches. It’s a fantastic project for crocheters looking for a rich texture without complex post-stitch work.
🧰 Materials & Tools
| Icon | Item | Details |
| Yarn | Main Yarn (MC) | Approximately 500–700 meters of Worsted (Category 4) or Bulky (Category 5) yarn. A yarn with good stitch definition (like cotton or acrylic) works best to showcase the texture. |
| Hook | Main Hook | 5.5 mm (I/9) for Worsted/Aran weight yarn, or 6.5 mm (K/10.5) for Bulky weight. Always check your yarn label and adjust to achieve a fabric that is firm but not stiff. |
| Notions | Finishing Tools | Scissors, Yarn Needle (for weaving ends). |
| Notions | Stitch Markers | Helpful for marking the start/end of the repeat in long rows. |
📏 Sizing & Gauge
The gauge is crucial for ensuring the dense, woven look. If your fabric is too loose, the lattice gaps will be too large.
| Measurement | Result |
| Pattern Repeat | 1 full pattern repeat = 4 stitches wide and 2 rows high. |
| Gauge Swatch | 4 Repeats (16 stitches) wide should measure approximately 9-10 cm (3.5–4 inches). |
| Note | The foundation chain must be a multiple of 4 stitches, plus 3 for the turning chain. |
📚 Abbreviations & Special Stitches
This pattern uses US terminology. The key to the texture is the placement of the Double Crochet (DC) stitches and the strategic chain spaces.
| Abbreviation | U.S. Terminology | Description |
| ch | Chain | |
| sl st | Slip Stitch | |
| sc | Single Crochet | |
| dc | Double Crochet | |
| tr | Treble Crochet | |
| sp | Space | |
| sk | Skip | |
| st(s) | Stitch(es) | |
| rep | Repeat |
🌟 Special Stitch: Intertwined Cluster (IC)
The cluster is formed by two sets of stitches: 2 DC worked before a skipped space, followed by 2 DC worked into that skipped space.
- IC Part 1: Work 2 DC into the next 2 stitches.
- IC Part 2 (Cross-Over): Ch 2, skip the next 2 stitches from the previous row.
📝 Pattern Notes
- Foundation: The starting chain is a multiple of 4, plus 3.
- Turning: Ch 3 at the start of a row always counts as one Double Crochet (dc).
- Cross-Over: The pattern creates the woven look by skipping stitches in one row and then working into those skip-chain spaces in the next row, forcing the stitch fabric to cross over itself.
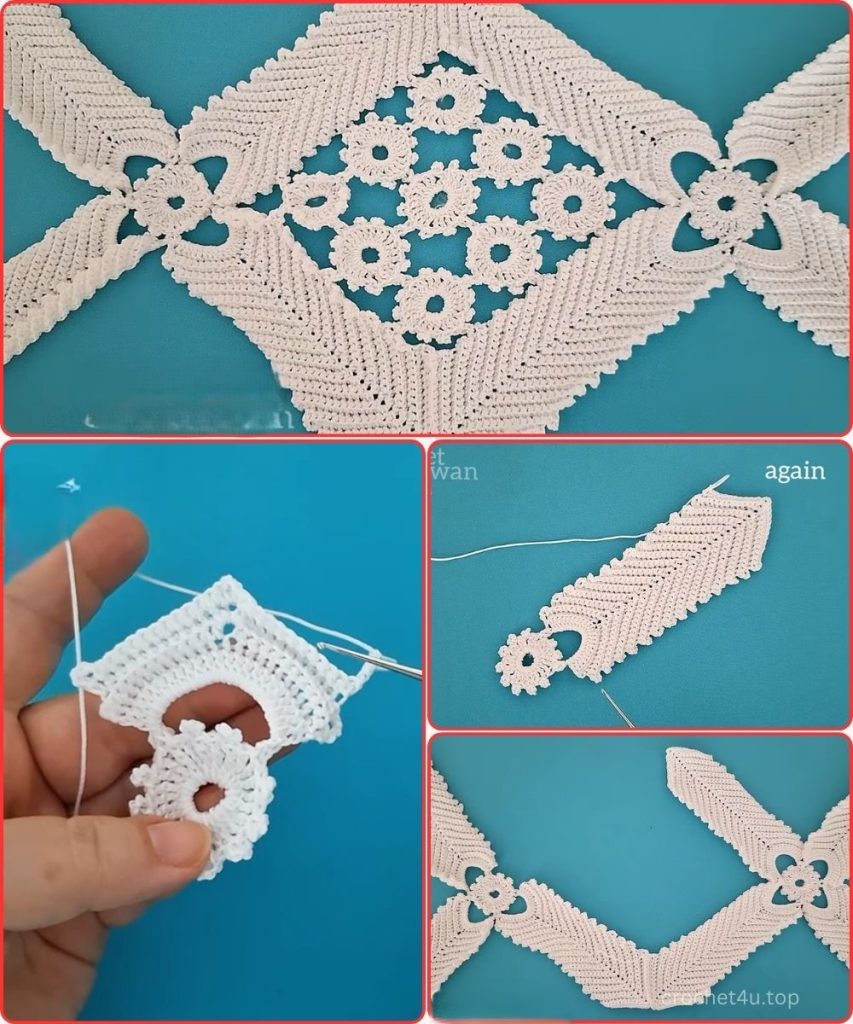
🧶 Part 1: The Lattice Stitch Repeat
The fabric is created by repeating a two-row sequence (Row 2 and Row 3) that builds the woven texture.

Foundation Row (DC Base):
Ch 23 (for 5 repeats: 5 x 4 + 3).
Row 1 (Setup – RS):
Dc in the 4th ch from the hook (the skipped 3 ch count as the first DC) and DC in each chain across.
(21 DC). Ch 3 (counts as DC), turn.
Row 2 (Front Lattice – WS):
- Start: Dc in the next st.
- Repeat:
[Ch 2, sk 2 sts, dc in the next 2 sts]across until the last 3 stitches remain. - End: Ch 2, sk 2 sts. Dc in the top of the turning Ch 3.(11 DC, 5 ch-2 spaces). Ch 3 (counts as DC), turn.
Row 3 (Intertwined Cross-Over – RS):
- Start: Dc in the next st.
- Repeat:
[2 DC into the ch-2 space from the previous row, dc in the next 2 dc]across until the last ch-2 space remains. - End: 2 DC into the last ch-2 space. Dc in the top of the turning Ch 3.(21 DC). Ch 3 (counts as DC), turn.
Row 4 (Back Lattice – WS):
This row staggers the chain spaces to create the continuous lattice effect.
- Start: Ch 2, sk the next 2 sts.
- Repeat:
[Dc in the next 2 sts, ch 2, sk 2 sts]across until the last 3 stitches remain. - End: Dc in the next 2 sts. Dc in the top of the turning Ch 3.(11 DC, 5 ch-2 spaces). Ch 3 (counts as DC), turn.
Row 5 (Intertwined Cross-Over – RS):
This row completes the second layer of the woven effect.
- Start: 2 DC into the ch-2 space from the previous row.
- Repeat:
[Dc in the next 2 dc, 2 DC into the ch-2 space from the previous row]across until the last 3 stitches remain. - End: Dc in the next 2 sts. Dc in the top of the turning Ch 3.(21 DC). Ch 3 (counts as DC), turn.
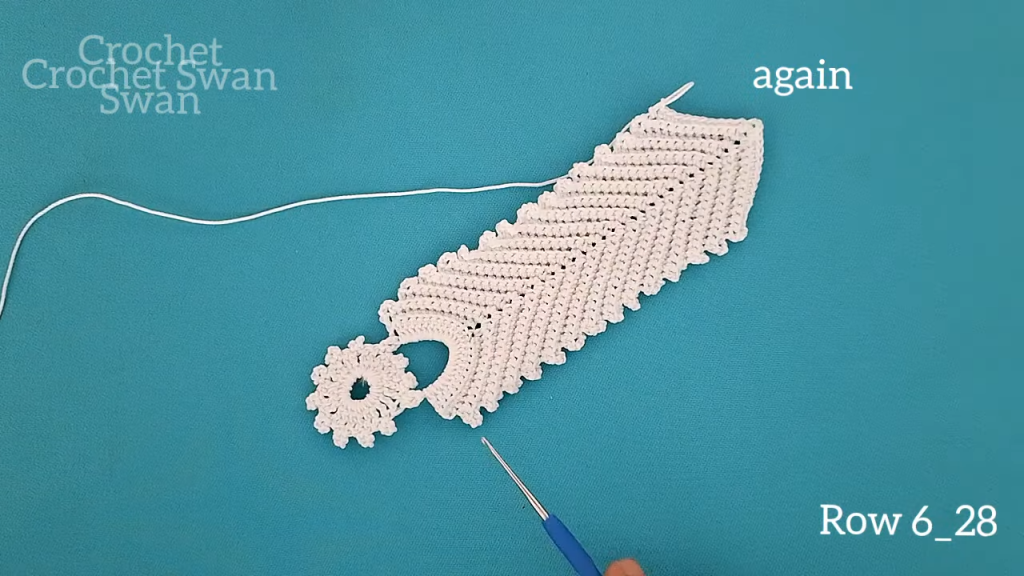
Continuing the Pattern:
To continue the Intertwined Lattice Stitch, repeat the sequence of Rows 2, 3, 4, and 5 until the desired length is reached.
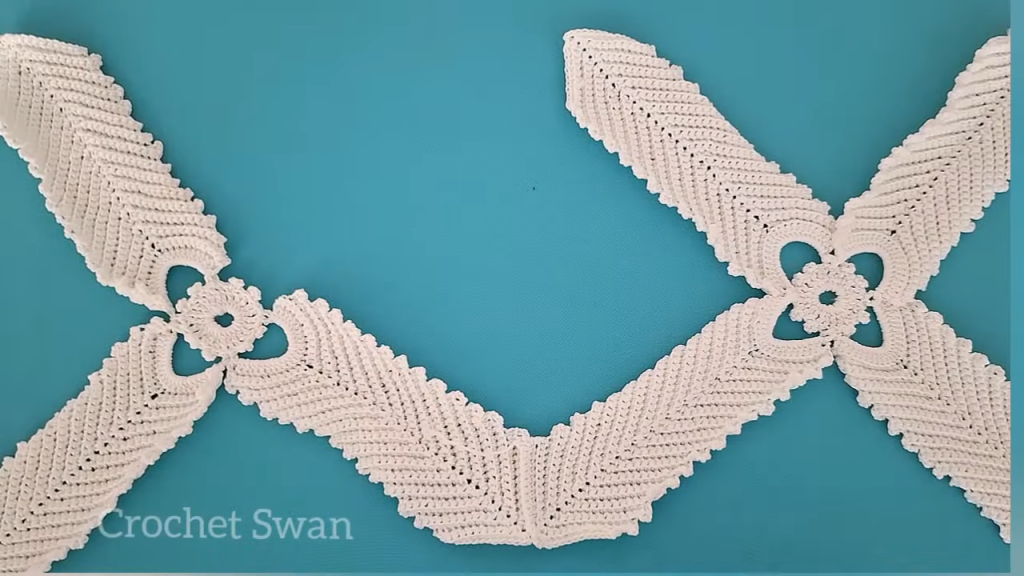
✂️ Part 2: Edging and Finishing
This pattern benefits from a simple border to frame the texture and clean up the side edges.
Final Row (Setup for Border):
Work one final Row 3 or Row 5 (the solid DC row) to ensure both ends of the project have a solid DC row. Fasten off if changing colors for the border, or continue with the same yarn.
Round 1 (SC Edging):
- Top/Bottom: Ch 1, SC in each DC stitch across the top edge.
- Corners: Work
(SC, ch 2, SC)in each corner. - Side Edges: Work 1 SC per row along the side edges, ensuring an even stitch count to prevent puckering. For the DC rows, work 2 SC per DC post.
- Sl st to the starting SC to join.
Round 2 (Optional Frame):
Ch 3 (counts as DC), DC in each SC around, working (DC, ch 2, DC) into the ch-2 corner spaces. Sl st to the top of the starting Ch 3.
Finishing:
Fasten off and use a yarn needle to carefully weave in all yarn ends, following the path of the existing stitches. Block the finished piece lightly to allow the woven texture to fully relax and settle.
Video Tutorial:
💡 Project Ideas for this Stitch
- Plaid/Blanket: This dense stitch provides incredible warmth and drape, making it ideal for a cozy blanket.
- Rug or Mat: Use T-shirt yarn or a thick cotton cord with a larger hook (10mm+) for a durable and textured floor mat.
- Structured Tote Bag: The firmness of the stitch means the bag will hold its shape beautifully without extensive lining or stiffening. Work the stitch in the round for a seamless body.
- Winter Scarf: The reversibility of the fabric makes it a perfect, non-fussy winter scarf.


