
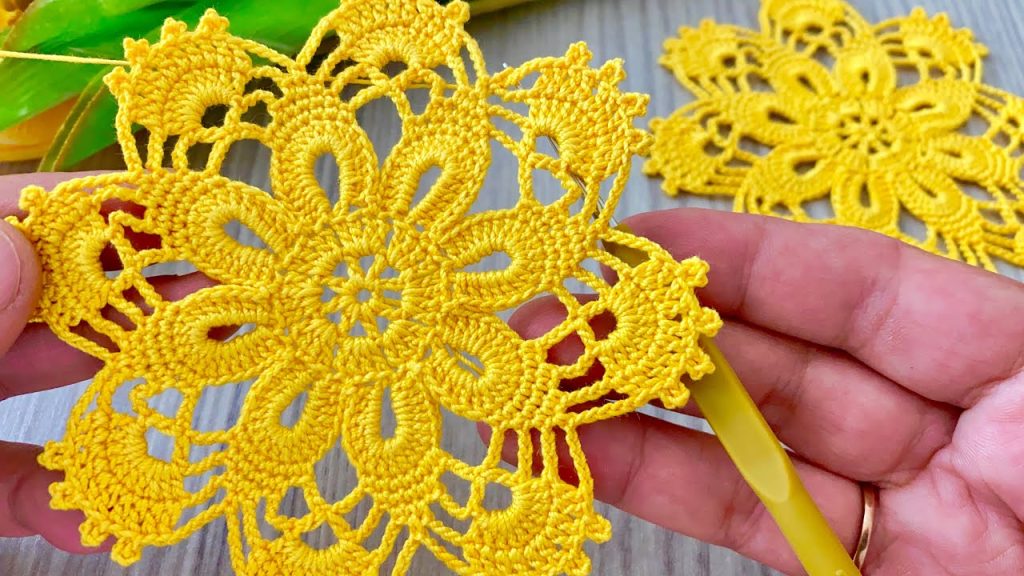
Welcome to the pattern for the “Elegant Woven Fan Stitch Motif”! This pattern showcases a truly unique and beautiful stitch that creates a highly textured, dense, and almost woven fabric. It’s an excellent choice for modular projects like blankets, cushion covers, or scarves, as the stitch holds its shape wonderfully and provides fantastic visual interest.
This pattern is written for a repeating square motif, making it easy to create many pieces for a large project.
🧰 Materials & Tools
| Icon | Item | Details |
| Yarn | Main Yarn (MC) | Aran/Worsted Weight yarn (Category 4). Cotton or cotton blend is ideal for crisp stitch definition. Approximately 50g per motif. |
| Hook | Main Hook | 5.0 mm (H/8), or the size needed to achieve a dense, defined gauge. |
| Notions | Finishing Tools | Scissors, Yarn Needle (for weaving and joining). |
| Notions | Stitch Markers | Essential for marking the corners if adapting to a square. |
Export to Sheets
📏 Gauge & Sizing
The size is determined by the number of repeats you choose. The basic repeat is 8 stitches wide and 4 rows high.
| Measurement | Result |
| Motif Repeat | 1 Pattern Repeat (4 rows) = 3.5 cm high. |
| Motif Repeat | 1 Pattern Repeat (8 stitches) = 4.5 cm wide. |
| Sample Square | A 3-Repeat x 3-Repeat Square (27 sts wide) = Approx. 14 cm x 14 cm (5.5 x 5.5 inches). |
| Note | The stitch pattern requires a starting chain that is a multiple of 8 + 3. |
Export to Sheets
📚 Abbreviations & Special Stitches
This pattern uses US terminology. The core of the design is the Woven Fan Repeat, which involves placing Double Crochet (DC) stitches into Single Crochet (SC) stitches from two rows below to create the raised texture.
| Abbreviation | U.S. Terminology | Description |
| ch | Chain | |
| sl st | Slip Stitch | |
| sc | Single Crochet | |
| dc | Double Crochet | |
| WS | Wrong Side | |
| RS | Right Side | |
| st(s) | Stitch(es) | |
| rep | Repeat | |
| sk | Skip |
Export to Sheets
🌟 Special Stitch: Woven Fan Repeat (WFR)
The fan is created by working 5 DC stitches into a SC stitch 2 rows below.
- WFR Fan Placement: The 5 DC stitches are worked into the Single Crochet (SC) from 2 rows below the current working row. This places the fan in front of the current row, creating the raised, woven texture.
- WFR Fan Support: The fan covers 5 stitches on the current row (the SC you work into + the 4 skipped stitches).
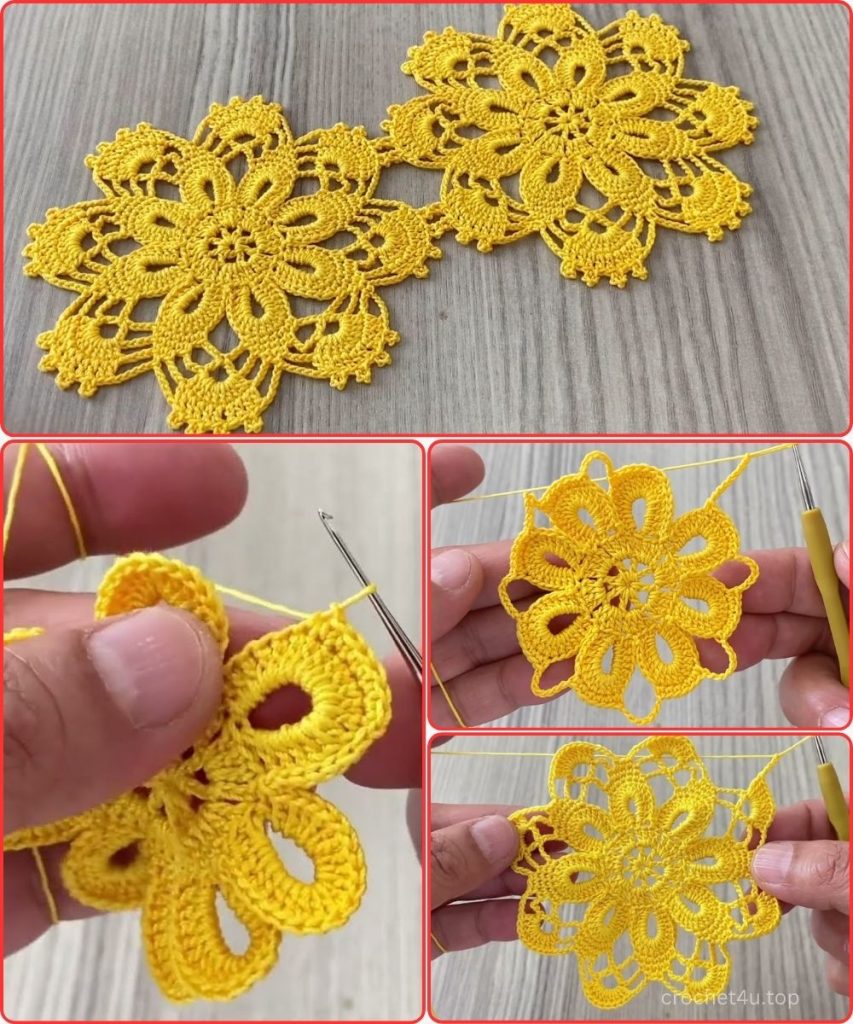
🧶 Part 1: The Linear Stitch Repeat
This section details the pattern worked in rows, ideal for scarves, table runners, or the foundation of a rectangular blanket.

Foundation Chain: Ch 27 (for 3 repeats, or any multiple of 8 + 3).
Row 1 (Foundation – RS): Sc in the 2nd ch from the hook, and in each ch across. (26 SC). Ch 1, turn.
Row 2 (SC Prep – WS): Sc in the first st and in each st across. (26 SC). Ch 1, turn.
Row 3 (Woven Fan – RS):
- Start: Dc in the first st (this sets the height).
- Repeat:
[SC in the next st (from Row 2), work 5 DC into the SC from **Row 1**, sk 3 sts]across until the last 5 stitches of the row. - End: SC in the next st, work 5 DC into the SC from Row 1, sk 3 sts, Dc in the very last st. (3 Fans + 2 DC, 6 SC). Ch 1, turn.
Row 4 (SC Prep – WS):
- Start: Sc in the first st (over the DC post).
- Repeat:
[SC in the next 5 DC sts (the top of the fan), SC in the next SC st]across. - End: Sc in the last st (over the DC post). (26 SC). Ch 1, turn.
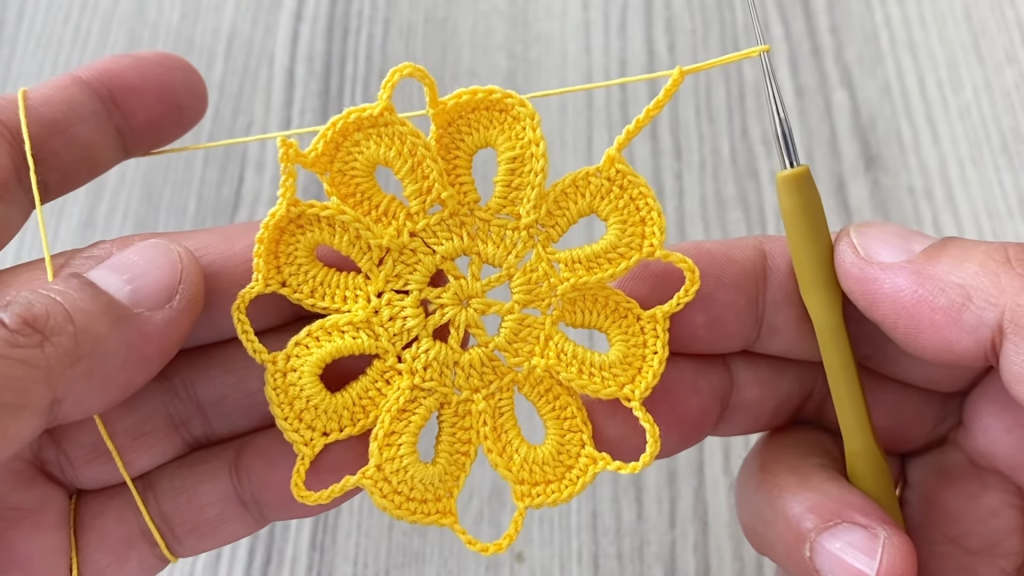
Row 5 (Reverse Fan – RS): This row staggers the fan pattern to create the unique woven grid.
- Start: Sc in the first 4 sts.
- Repeat:
[Work 5 DC into the SC from **Row 3** (the top of the previous fan), sk 3 sts, SC in the next st]across. - End: The last stitch should be an SC. (3 Fans + 9 SC). Ch 1, turn.
Row 6 (SC Prep – WS): Rep Row 4. (26 SC). Ch 1, turn.
Row 7 (Woven Fan Realign): Rep Row 3. (3 Fans + 2 DC, 6 SC). Ch 1, turn.
Row 8 (SC Prep – WS): Rep Row 4. (26 SC). Ch 1, turn.
Continuing the Pattern: To continue the linear fabric, simply repeat Rows 5–8 until the desired length is reached. End after a Row 4/Row 8 repeat (an SC prep row) for a clean edge.

◻️ Part 2: Forming the Motif Square
To use this stitch in a modular project, you will create individual squares.
- Motif Dimensions: Decide on the size of your square. For a 3-repeat square, work Rows 1–8 of the linear stitch (Part 1).
- Final SC Round: After completing a Row 8 repeat (or any even-numbered SC row), you will work a final SC round around the entire perimeter to create clean joining loops.
- Round 1 (Edging): Ch 1, SC in each stitch across the top row.
- Side Edge: Work SC evenly down the raw side edge. Aim for 2 SC per fan-pattern section (4 rows) and 1 SC per SC-prep section (4 rows), or simply work 3 SC for every 4 rows of height.
- Corners: Work
(SC, ch 1, SC)into the corner stitch to make it sharp and easily joinable. - Bottom Edge: SC into each stitch of the foundation chain.
- Repeat the SC edging on the final side and corner. Sl st to the starting SC. Fasten off and weave in ends.
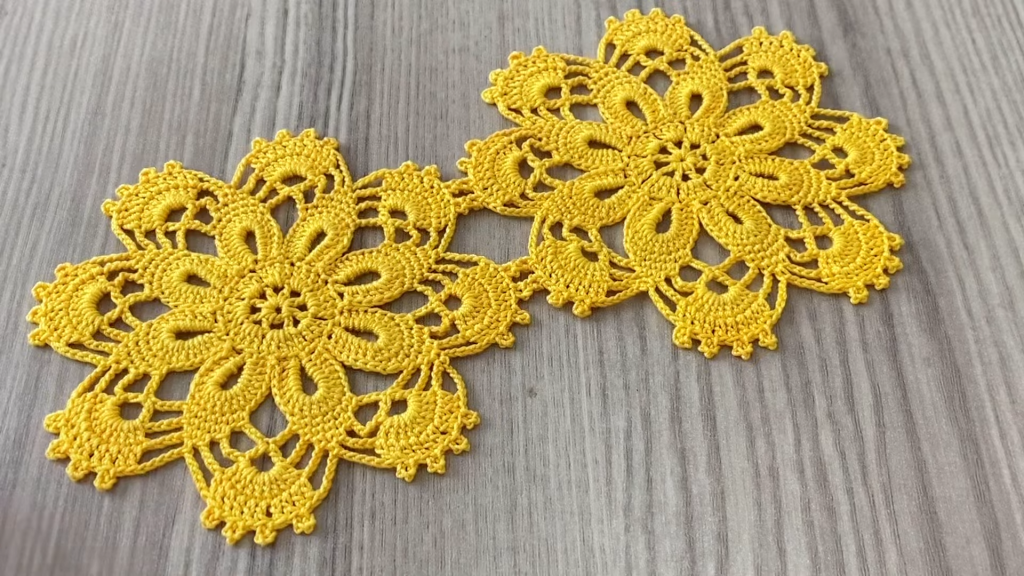
🔗 Joining & Finishing
- Blocking: Blocking is essential for this highly textured stitch to ensure the squares lie flat and the edges align perfectly for seaming.
- Joining Method: The recommended method for a neat seam is the Slip Stitch Join or Single Crochet Join worked through the Back Loop Only (BLO) of both motifs, from one corner space to the next.
- Border (Optional): Once all motifs are joined, you may choose to add a uniform border to the entire project using a few rounds of simple SC or DC, ensuring you work an increase
(st, ch 2, st)in each of the four main corners.


