
Welcome to the blog, fellow yarn enthusiasts! We’re diving into a beautiful project today: a textured, floral-inspired motif perfect for creating a stunning blanket, a cozy throw, or an elegant cushion cover. This is a wonderfully rewarding pattern that uses simple stitches to create a sophisticated, repeating design. Get ready to turn your yarn stash into a treasured heirloom!
📋 Project Quick Details
| Skill Level | Intermediate (Requires knowledge of basic stitches and working in the round) |
| Approx. Size | 4 x 4 inches (10 x 10 cm) before blocking (using recommended materials) |
| Gauge | Motif measures 4″ x 4″ after Round 4 |
| Project Ideas | Blankets, Throws, Scarves, Cushion Covers, Bags |
🧶 Materials You’ll Need
- Yarn: Worsted weight (Size 4) cotton or acrylic yarn in two contrasting colors (Color A for the center, Color B for the outer rounds). A sturdy yarn like cotton will help the texture stand out.
- Hook: Size H/8 (5.0 mm) crochet hook, or size needed to obtain gauge.
- Notions: Yarn needle for weaving in ends, scissors.
📝 Essential Abbreviations (US Terms)
- Ch: Chain
- Sl St: Slip Stitch
- Sc: Single Crochet
- Hdc: Half Double Crochet
- Dc: Double Crochet
- Tr: Treble Crochet
- St(s): Stitch(es)
- Sp: Space
- Sk: Skip
- Beg: Beginning
- Cl: 3-Double Crochet Cluster (Yarn over, insert hook into st/sp, yarn over, pull up loop, yarn over, pull through 2 loops) 3 times in the same st/sp. Yarn over, pull through all 4 loops on the hook.
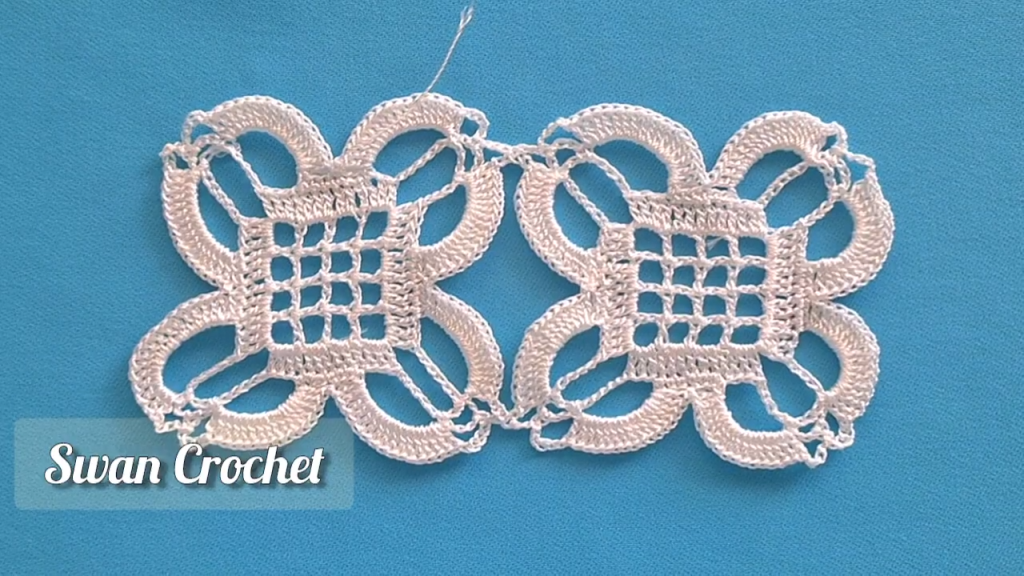
🌸 The Bloom & Texture Motif Pattern
This motif is worked in the round from the center out.
Start: Using Color A (center color).
Ch 4, join with a Sl St to the first Ch to form a ring.
Round 1: Establishing the Center
Ch 3 (counts as first Dc), 11 Dc into the ring. Join with a Sl St to the top of the beginning Ch 3. (12 Dc)
This forms a solid, neat circle to start our motif.
Round 2: Creating the Popcorn Texture
Ch 3 (counts as first Dc), work 4 more Dc into the same St. Drop loop from hook, insert hook into top of beginning Ch 3, pick up dropped loop and pull through (Popcorn St made).
Ch 1, then (work 5 Dc in the next St, make a Popcorn St, Ch 1) around. Join with a Sl St to the top of the first Popcorn St. (12 Popcorn Sts, 12 Ch-1 Sps)
Fasten off Color A.
This round gives the motif a beautiful raised, floral-like texture.
Round 3: Corner Formation (Switching to Color B)
Join Color B into any Ch-1 Sp with a Sl St.
Ch 2 (counts as first Hdc), 2 Hdc in the same Ch-1 Sp.
Ch 1, 3 Hdc in the next Ch-1 Sp. (Ch 3, 3 Hdc in the next Ch-1 Sp – this is a corner).
(Ch 1, 3 Hdc in the next Ch-1 Sp) 2 times.
(Ch 3, 3 Hdc in the next Ch-1 Sp – this is the next corner).
Repeat the sequence between the parentheses two more times.

After the final corner Ch 3, join with a Sl St to the top of the beginning Ch 2. (4 corner spaces, 4 side groups of 3 Hdc separated by Ch 1)
We are now beginning to turn the circular center into a square, which is essential for joining.
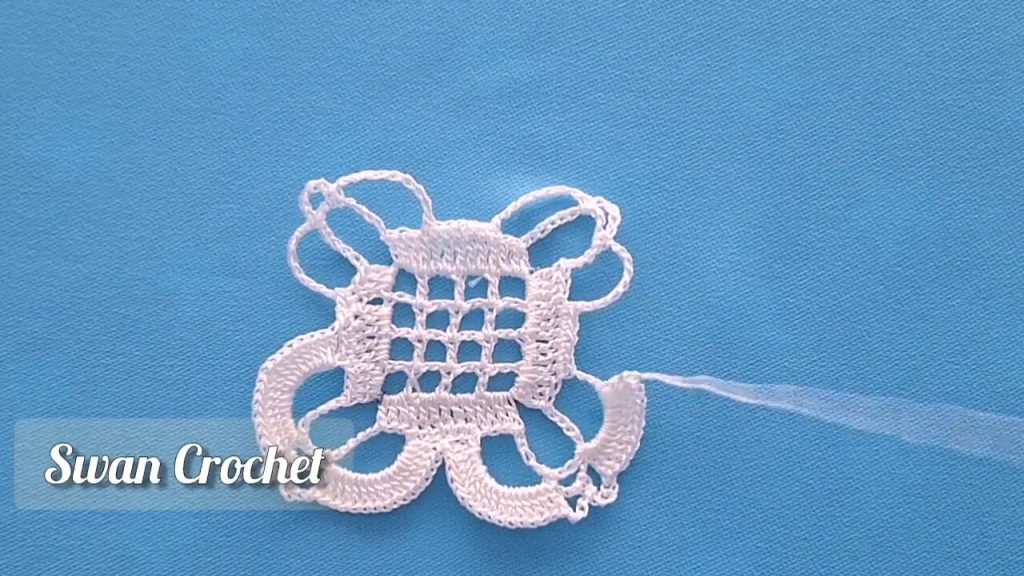
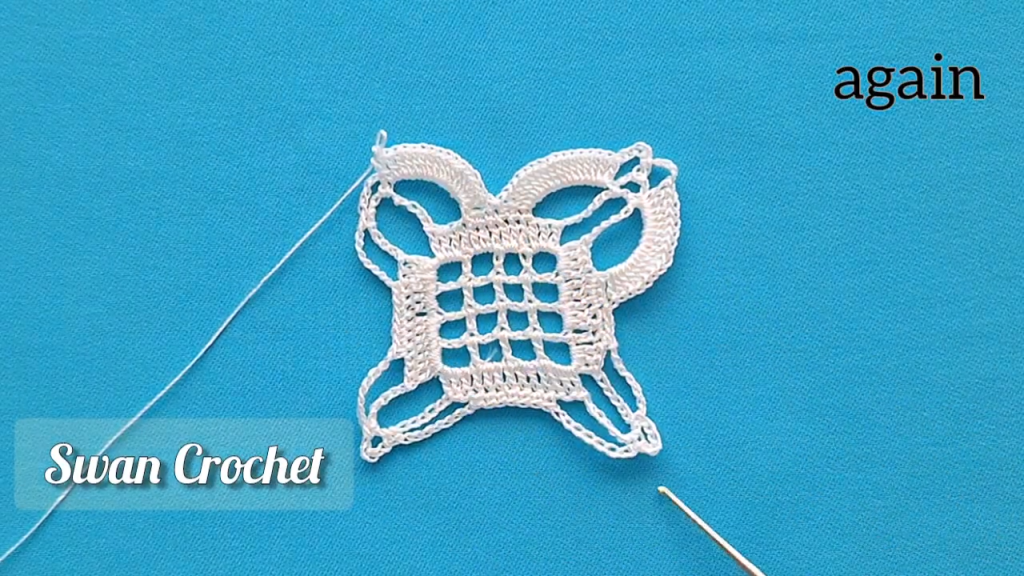
Round 4: Squaring Up and Detailing
Ch 1 (does not count as a St), 1 Sc in each of the first 3 Hdc.
In the next Ch-1 Sp, work 1 Dc, Ch 1, 1 Dc.
(1 Sc in each of the next 3 Hdc, Ch 1, 1 Sc in the Corner Ch-3 Sp, Ch 3, 1 Sc in the Corner Ch-3 Sp, Ch 1, 1 Sc in each of the next 3 Hdc).
Repeat the sequence between the parentheses two more times.
The final side is completed as follows: 1 Sc in each of the next 3 Hdc, in the next Ch-1 Sp, work 1 Dc, Ch 1, 1 Dc.
Join with a Sl St to the first Sc. (24 Sc, 8 Dc, 4 Corner Ch-3 Sps, 8 Ch-1 Sps)
Fasten off Color B, leaving a long tail for weaving.
This final round provides the clean, straight edges needed for seamless joining and adds a decorative picot-like element to the corners.

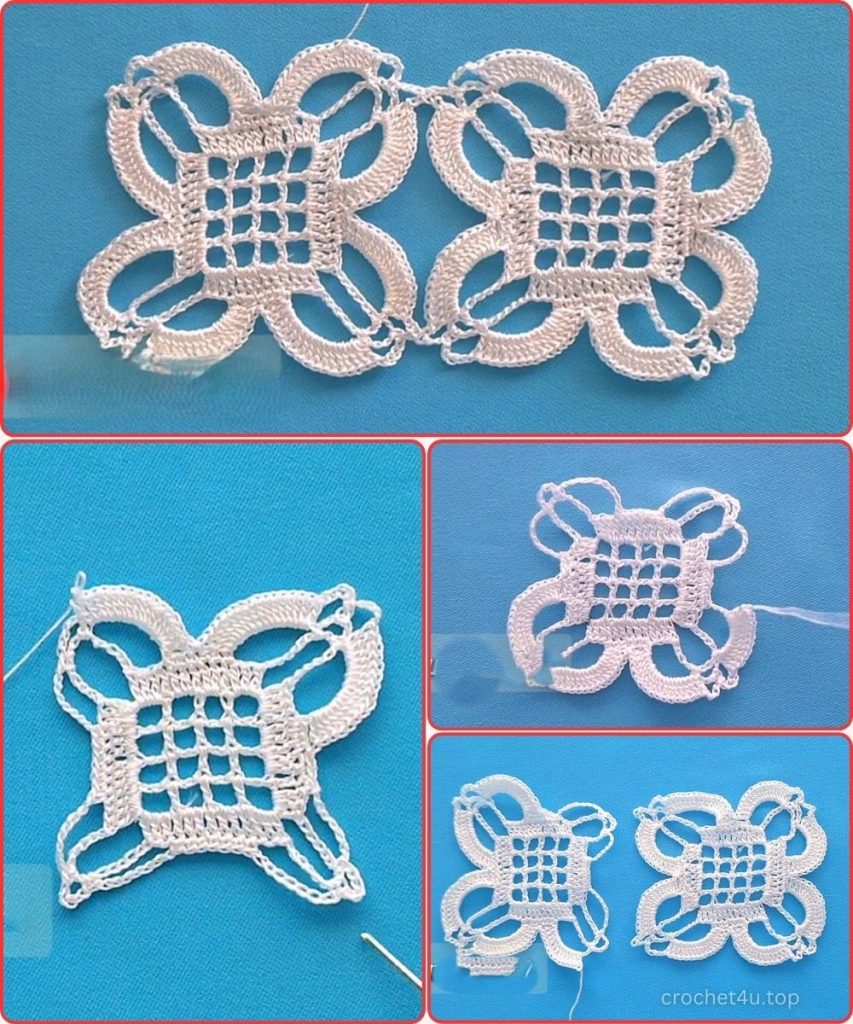
🧵 Joining the Motifs
For a large project like a blanket or pillowcase, you will need to join many of these motifs together. The “Join As You Go” (JAYG) method is highly recommended for an invisible and strong seam.
- Work the First Motif: Complete the first motif through the end of Round 4, fastening off.
- Start the Second Motif: Work the second motif through the end of Round 3.
- Round 4 (Joining Round): When working Round 4 of the second motif, replace the Ch 1 and Ch 3 spaces with slip stitches into the corresponding spaces of the first, completed motif.
Joining Steps during Round 4 of the Second Motif:
- Joining a Ch-1 Sp: Where the pattern calls for “Ch 1,” make 1 Ch, then Sl St into the corresponding Ch-1 Sp of the completed motif, then finish the pattern for the current motif.
- Joining a Corner Ch-3 Sp: Where the pattern calls for “Ch 3,” make 1 Ch, Sl St into the Corner Ch-3 Sp of the completed motif, make 1 Ch, then finish the pattern for the current motif.
By replacing the chains with a Sl St connection to the adjacent motif, you create a flat, secure, and beautiful seam that eliminates the need for sewing later!
✨ Finishing Touches and Blocking
Congratulations on crocheting your motifs! Now, let’s make them truly shine.
- Weave in All Ends: Using your yarn needle, carefully weave in all yarn tails on the wrong side of the work. Take your time to ensure they are hidden and secured so your project lasts for years.
- Blocking: This step is crucial for motif work! Blocking evens out the tension, opens up the stitch pattern, and—most importantly—ensures all your squares are the exact same size and perfectly square, which is essential for a clean final assembly.
- Method: Wet the motifs thoroughly (or steam them), gently press them into a perfect square shape on a blocking mat, and secure the edges with pins.
- Time: Allow them to dry completely (this may take 12-24 hours).
Once all your motifs are joined and blocked, you can add a final border to your blanket or pillowcase. A simple round of Sc or Dc, followed by a final shell edging, will give your project a polished, professional look.
Happy Crocheting! Be sure to share your finished “Bloom & Texture” projects!


