
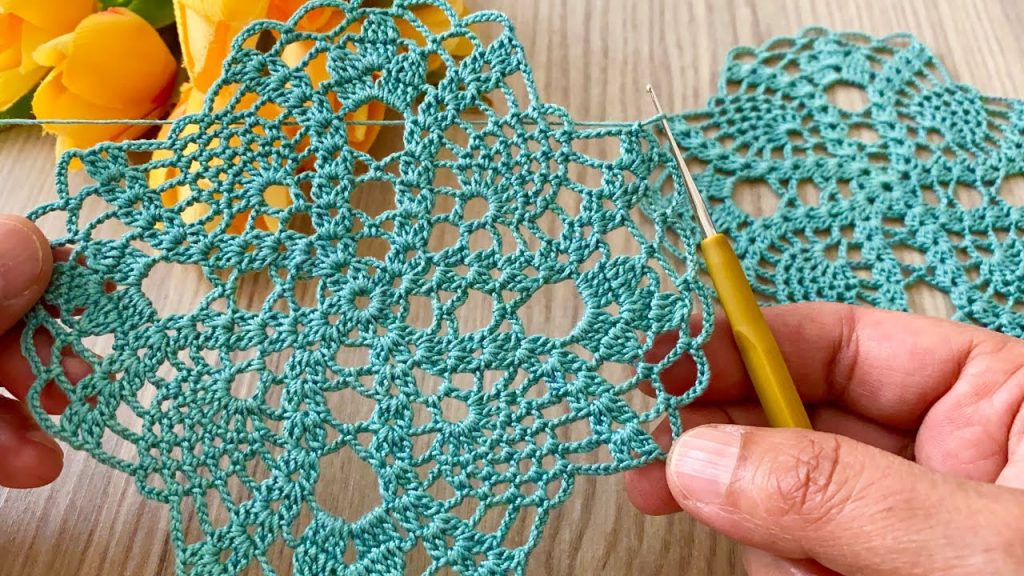
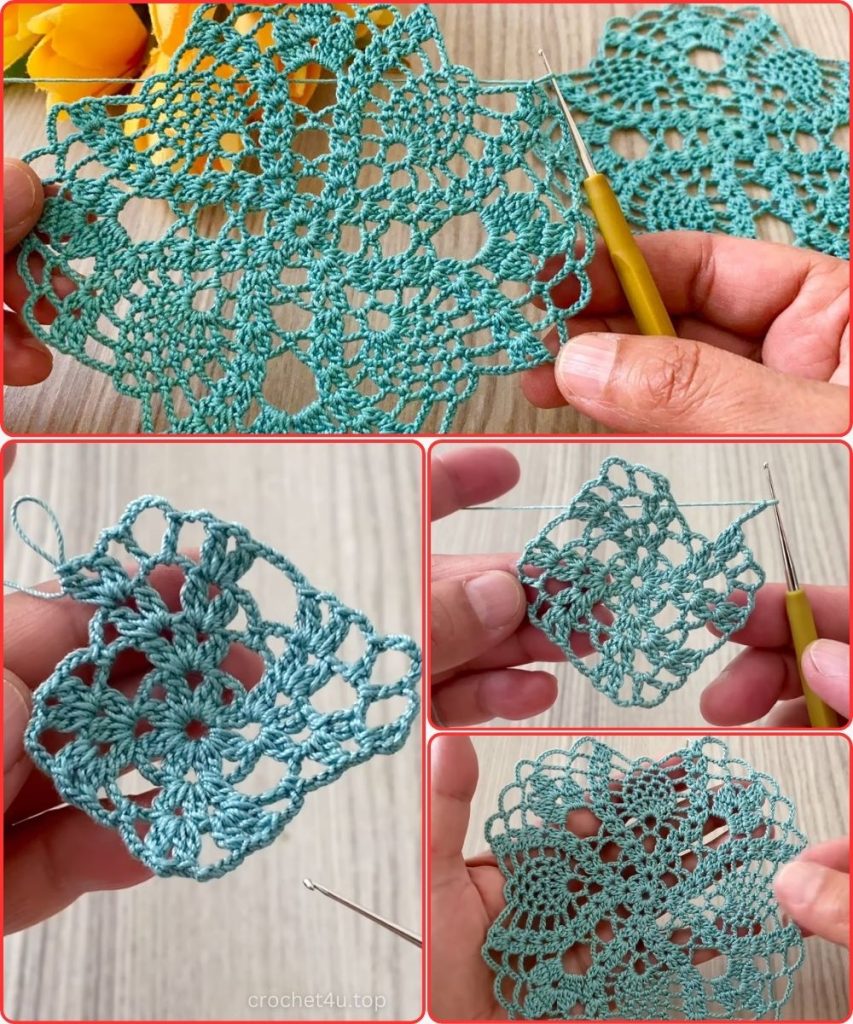
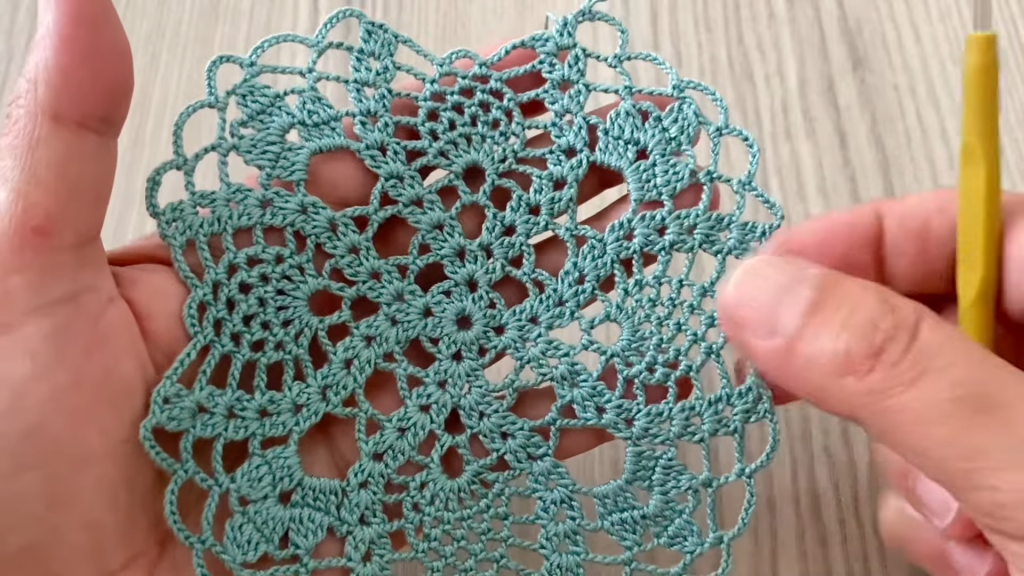
Welcome, brilliant crafters, to a truly captivating project! The motif in the video is a showstopper, featuring a mesmerizing textured center that radiates outwards, framed by delicate, classic lacework. I’ve broken down this beauty into an original pattern I call the Celestial Starburst Square. This pattern yields a sturdy yet beautiful square, perfect for joining into blankets, throws, or decorative pillowcases that look incredibly complex but are a joy to crochet.
The starburst texture is achieved using simple Popcorn stitches, making this accessible to intermediate crocheters looking to expand their skills!
✨ Project At a Glance
| Skill Level | Intermediate |
| Finished Size | Approximately 6 x 6 inches (15 x 15 cm) after blocking (using recommended materials) |
| Construction | Worked in the round from the center out |
| Stitches Used | Popcorn, Double Crochet, Treble Crochet, Chain |
| Project Ideas | Blankets, Bedspreads, Bags, Coasters |
🧶 Materials and Preparation
This pattern works beautifully in high-contrast colors to emphasize the central starburst, or in a single color to highlight the texture.
- Yarn: Worsted (Medium Weight / Size 4) acrylic or cotton blend. Cotton is excellent for defining the Popcorn texture.
- Color A (Center/Star): Approx. 15 yards
- Color B (Border/Squaring): Approx. 20 yards
- Hook: Size H/8 (5.0 mm) crochet hook, or size needed to obtain gauge.
- Notions: Yarn needle for weaving in ends, scissors, stitch marker (optional, for center).
📝 Essential Stitch Abbreviations (US Terms)
Familiarize yourself with the Popcorn stitch—it’s the heart of this pattern!
- Ch: Chain
- Sl St: Slip Stitch
- Sc: Single Crochet
- Dc: Double Crochet
- Tr: Treble Crochet (Yarn over twice)
- St(s): Stitch(es)
- Sp: Space
- Popcorn St (Pc St): Work 5 Dc into the same St. Drop the loop from your hook. Insert hook into the top of the first Dc of the 5-Dc group, grab the dropped loop, and pull it through. Ch 1 to secure (this securing Ch is not counted as a Chain Space unless specified).
🌟 The Celestial Starburst Square Pattern
This motif is worked in 6 rounds. We will be using Color A for the first 3 rounds to form the starburst and Color B for the squaring and border rounds.
Center Starburst (Color A)
Start: Using Color A.
Make a Magic Ring (or Ch 4, Sl St to first Ch to form a ring).
Round 1: Foundation Ring
Ch 3 (counts as 1 Dc), 15 Dc into the ring. Join with a Sl St to the top of the beginning Ch 3. (16 Dc)
Gently pull the tail of the magic ring to tighten the center.
Round 2: The Popcorn Petals
Ch 1 (does not count as a St). 1 Sc in the first St.
Ch 3, Sk 1 St, 1 Sc in the next St.
Repeat from * to * 7 more times. After the final Ch 3, join with a Sl St to the first Sc. (8 Sc, 8 Ch-3 Sps)
These 8 chain loops will be the base for our starburst petals.
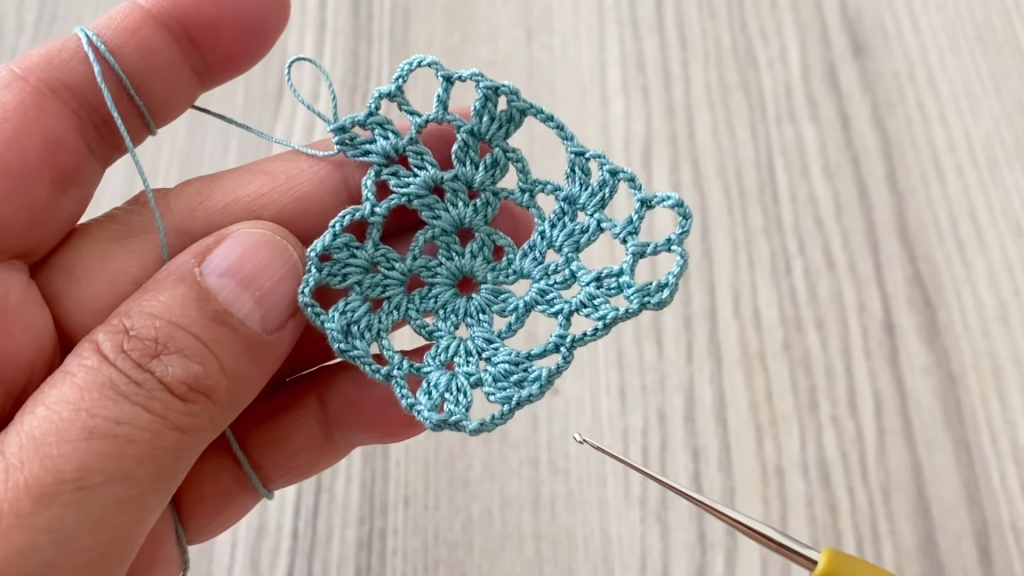
Round 3: Starburst Layer
Sl St into the first Ch-3 Sp.
Ch 3 (counts as 1 Dc). Work 4 Dc into the same Ch-3 Sp. Drop loop from hook, insert hook into top of beginning Ch 3, pick up dropped loop and pull through (1 Pc St made).
Ch 3, then work 1 Pc St into the next Ch-3 Sp.
Repeat from * to * 6 more times. After the final Pc St, Ch 3, join with a Sl St to the top of the first Popcorn St. (8 Pc Sts, 8 Ch-3 Sps)
Fasten off Color A.
Squaring and Border (Color B)

Round 4: First Squaring Row
Join Color B into any Ch-3 Sp with a Sl St.
Ch 3 (counts as 1 Dc). Work (1 Dc, Ch 2, 2 Dc) in the same Ch-3 Sp (First Corner made).
- [1 Dc in the next Pc St, 2 Dc in the next Ch-3 Sp, 1 Dc in the next Pc St]. Work this sequence 2 times total (Side 1 and 2).In the next Ch-3 Sp, work (2 Dc, Ch 2, 2 Dc) (Corner made).Repeat from * to * 2 more times for the remaining sides. Join with a Sl St to the top of the beginning Ch 3. (48 Dc, 4 Ch-2 Sps)We are now fully transitioning from the circular center to a square shape.
Round 5: Defining the Corners (Using Treble Crochet)
Ch 3 (counts as 1 Dc). 1 Dc in each Dc until the corner Ch-2 Sp.
In the corner Ch-2 Sp, work (2 Tr, Ch 2, 2 Tr). 1 Dc in each Dc across the side.
Repeat from * to * 3 more times. 1 Dc in each of the remaining Sts. Join with a Sl St to the top of the beginning Ch 3. (4 Corner Ch-2 Sps, total number of Dc increases)
The Treble Crochets give the corners a clear height advantage, creating sharp, defined points for the square.
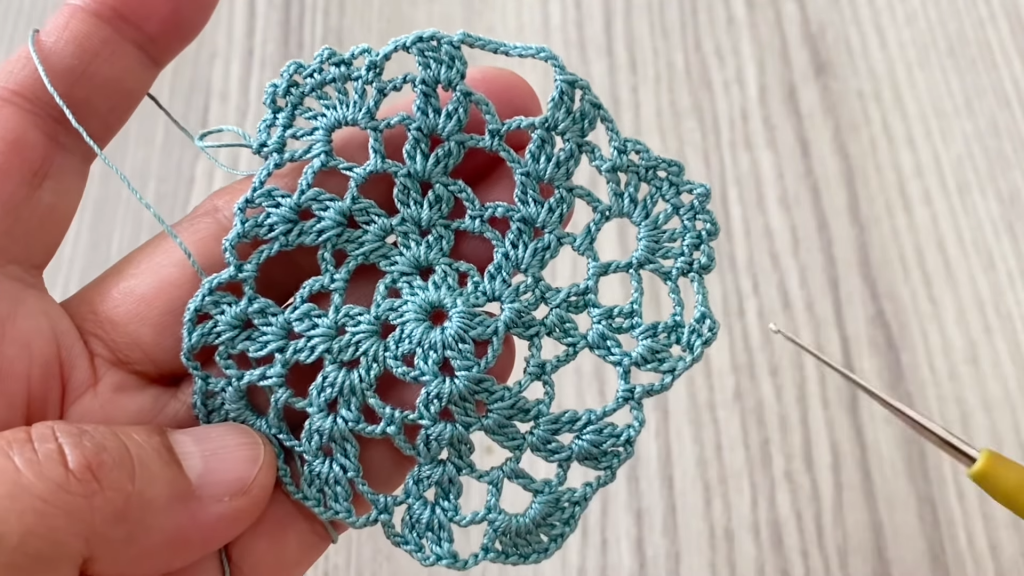
Round 6: The Final Lacy Border
Ch 1 (does not count as a St). 1 Sc in the first St.
1 Sc in each St across the side until the corner Ch-2 Sp.
In the corner Ch-2 Sp, work (1 Sc, Ch 3, 1 Sc) (Corner made).
Repeat from * to * 3 more times. 1 Sc in each of the remaining Sts. Join with a Sl St to the first Sc. (Total Sc count will depend on your gauge, but the sides will be neatened up).
Fasten off Color B.
This final row of single crochet creates a clean, sturdy edge that is perfect for seaming or adding a final border.
🤝 Joining Your Motifs (The JAYG Method)
When creating a blanket or garment, joining the squares seamlessly is key. The Join-As-You-Go (JAYG) method ensures a flat, beautiful seam without the need for sewing later!
- Preparation: Complete your first motif through Round 6.
- Joining Square: Work your second motif through the end of Round 5.
- Round 6 (The Joining Row): When working Round 6 of the second motif, replace the chain spaces on the joining edge with slip stitches into the corresponding stitches of the completed motif.
Joining Steps:
- Corner Join: When you reach the first corner Ch-2 Sp on the joining side, work:
1 Sc in the Ch-2 Sp, Ch 1, Sl St into the Corner Ch-3 Sp of the completed motif, Ch 1, 1 Sc in the same Ch-2 Sp of the working motif. - Side Join (Optional): To make the seam extra secure, you can replace a few of the middle Sc stitches along the joining edge with Sl Sts into the corresponding Sc of the finished motif. For a simple join, continue with Sc until the next corner.
Video Tutorial:
🛁 Finishing and Care
- Weaving Ends: Securely weave in all yarn tails on the back side of the work using your yarn needle. This is crucial for a tidy, professional finish.
- Blocking (Recommended): Blocking is vital to ensure all your motifs are the exact same size and perfectly square, which makes the final assembly easy and invisible.
- Method: Wet the motifs thoroughly (or steam lightly). Gently stretch and pin the motifs into a perfect square shape on a foam blocking mat, securing the four corners.
- Drying: Allow them to dry completely before unpinning.
Enjoy the striking texture and geometry of your new Celestial Starburst Square project!


